Search this blog

31 May 2008

Make a Moo

The challenge on Make a Moo or Two this week is to use just
brown, beige & cream.


The mountboard base was covered in papers & elements from Crafty Individuals,
K&Company
& a free download from Crafts Beautiful.

The butterflies are from a photograph I took in my garden last month
of a Speckled Wood butterfly.

The Moo was edged with Distress Ink (walnut stain).

30 May 2008

The Door to my Heart

The challenge on Layers of Color is to make a 4x4 inch page
that illustrates something that opens.
This is to celebrate the opening of their new online store.


To make the base
The mountboard base was coloured using Distress Inks (tattered rose & aged mahogany).
I then overstamped with a heart stamp from Crafty Individuals
& an Amore word stamp by Magenta.
I then gave it a quick wash with Adirondack Acrylic Paint (Cranberry).

To make the doors
I stamped the swirly heart stamp by Magenta onto white card
& mounted them onto pieces of mountboard.
Using a water brush, I blended in the aged mahogany ink.
Once dry, I added colour from a peeled paint inkpad.
I stamped the image again onto Hannah paper by K&Company,
cutting out the central heart shape & layering it onto the original stamped image.

I made hinges from strips of the patterned paper to attach the doors to the base.

The door handle heart is another Magenta stamp, coloured again with Distress Inks
& mounted onto mountboard.

Hidden behind the doors
I stamped the large Crafty Individuals heart image onto the K&Company paper,
cutting it out and layering onto the centre of the base. The words inside say "is yours".

I added doodles with a black pen.
The base, doors & handle were all edged with a Krylon 18ct gold leafing pen.
Finally I added a small key by 7 Gypsies
& a drop or two of Inkssentials Glossy Accents.

29 May 2008

Walk Tall

The challenge this week on Make & Moo or Two is
Dots & Stripes.


I covered parts of the white mountboard base with masking tape
& coloured over the top with black ink.

I used a piece of foam to do this & it gave a grey tone, which was perfect.

I then removed the masking tape & overstamped the base
using the same ink & a rubber stamp
(which was free with an issue of Craft Stamper magazine).

I coloured in some of the dots with a black pen &
some with an Inkssentials white opaque pen.

The dots were then covered in Glossy Accents to add dimension.

I printed out my stilt walking man
(sporting stripy trousers & wearing a dotty ribbon round his hat)
in grey tone.

I enlarged the hat to form the top & bottom of the Moo.

It was then edged in black ink.

The image was taken from a copyright free graphics cd

Joker in the Pack

The challenge set this week on Wednesday Stamper is to alter a playing card.


I have used two playing cards for this challenge; one as the base & the other to cut up. The base card was covered in torn newspaper print & covered with a thin wash of Adirondack Acrylic Paint Dabber (Lake Mist).

I stamped the Paper Artsy dream girl image on white tissue paper with Archival Ink (Jet Black), reversing the image to match the direction of the Joker's head.

The card was edged with Distress Ink (fired brick). I added two red metallic eyelets & through one tied a bell with gold metallic thread.

28 May 2008

B is for Boy

The inchie challenge on the Small World of Inchies blog* this week is Boys.


I used a rubber stamp from Paper Artsy, Archival Ink (Jet Black), Distress Inks (spiced marmalade & broken china) & Glossy Accents.


* This challenge blog is no longer in existence.

25 May 2008

Air Mail

The inchie challenge on Inchy by Inch this week is Postal Art.


I have used elements from Crafty Individuals paper & from K&Company.


There is some blog candy up for grabs on this week's challenge donated by Nina at Purple Faerie Paper Crafts.

24 May 2008

After the rain

The challenge on Layers of Color is to make an umbrella for our project. 

I have made an Artist Trading Card.


The mountboard base was coloured with Distress Inks
(tattered rose, antique linen & milled lavender).

I used a clear stamp by Claritystamp, inked with Distress Ink
(peeled paint) to decorate the corners.
I then triple embossed using clear VersaMark Ink
& clear embossing powder.

The lady is printed from a copyright-free graphics cd
from Crafty Computer Paper.

I made her an umbrella from a semi-circle of pink card,
which had been stamped in black ink with the same clear stamp.

The top of the umbrella was cut using deckle edged scissors.

I made a handle from gold wire & beads.


I used Glossy Accents to highlight the flower in her hair.

I also used it on the bottom of her dress & umbrella
to make it look like she had been caught in a shower of rain.

23 May 2008

Square Dance

I decided to make an Artdoll for the Be Square challenge on Wednesday Stamper.

Here is his tale of woe.

As Henri entered the room, he realised at once that he had misunderstood the invitation. It read

You are invited to a Square Dance. Please dress appropriately.

He hid the invitation behind his back & tip-toed out quietly, hoping no-one had noticed him.


I used a stamp by Claritystamp with a template from the extremely talented & generous Barbara. The legs are attached with brads, so they can be moved. I used Distress Inks to colour.

22 May 2008

Memories

The inchie challenge on Inchy by Inch this week is Places.


My inchie illustrates aspects that come to mind when I think of a particular country.


  • The background paper reminds me of Delft Pottery.
  • The patterned vellum reminds me of Dutch Lace.
  • The clear gems represent the diamond market.
  • & finally, the image of a windmill (a clear miniature stamp by Claritystamp).


  • Of course, the country is The Netherlands.

    21 May 2008

    Every picture tells a story

    The challenge set on Arty Girlz was to recycle something. Inspired by Julie's project I decided to alter a picture frame.


    The picture frame was bought years ago from Ikea & had been sitting unused ever since in my stationery drawer.


    I covered the frame using words from the first chapter of the book that I never finished writing – time to put it to good use.

    The paint was found in the garage – a 75ml test pot from Texas Homecare. Memory eludes me as to why it was bought.

    The flowers were made from leftover card, printed out for an earlier project.

    The frame is shown here displaying an Artist Trading Card which was made for a recycling challenge earlier this year. See here for details.

    20 May 2008

    A Touch of White

    The inchie challenge theme on the Small World of Inchies blog* is White.


    The background is from Shabby Princess. The words are from paper by K&Company, which had an acrylic paint wash painted over.

    I also used Glossy Accents, an Inkssentials opaque pen, a Sakura clear stardust pen, white eyelets, white cotton thread & white ink.

    * This challenge blog is no longer in existence.

    19 May 2008

    What is Art?

    The challenge set this week on Wednesday Stamper is to Art it up!


    I decided to make an altered canvas,
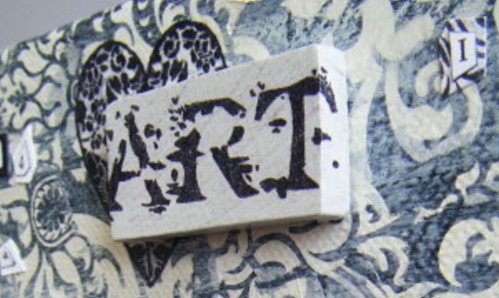
    using rubber stamps from Paper Artsy (lady), Crafty Individuals (heart) & Elusive Images (art).


    I used a blank canvas, a wooden domino, grungeboard letters, gold beading wire, beads, patterned
    & white tissue paper with acrylic paint (Lake Mist) & Archival Ink (Jet Black).


    The bird was cut from paper designed by Shabby Princess, using my own template.


    The canvas reads 

    "What is art if not a reflection of our soul"

    17 May 2008

    Bathing Belles

    The challenge this week on Make a Moo or Two is on the theme of
    Beach & Sea.


    The papers are designs from Shabby Princess &
    the images from a copyright free graphics cd

    16 May 2008

    Birthday Banner

    This card uses paper & elements from the Shabby Princess Moody Blues range & textured cardstock from Bazzill Basics.


    The two sets of letters were cut out using a circle paper punch. The top layer was made into a banner, with silver metallic thread. They were adhered to the bottom layer using black 3d foam pads.

    Three black brads were added as the finishing touch.

    15 May 2008

    Funky Birthday

    This is a birthday card using the new Shabby Saturday paper & elements from Funky Hand, printed onto textured cardstock from Bazzill Basics.


    The flowers were shaped using an embossing tool & pale pink gems added to the centres.

    The message was mounted using 3d foam pads & a few more gems were added as the final touch.

    14 May 2008

    A Travel Adventure

    For this week’s challenge theme on Arty Girlz of Travel & Places, I have made an Artist Trading Card.


    The mountboard base was coloured using Distress Inks (weathered wood, tattered rose, milled lavender & a touch of broken china) & then sprayed with a fine mist of water.

    I overstamped the background with images from Non-Sequitur, Sugarloaf & 7 Gypsies, using Distress Ink (walnut stain) & then edged the ATC with the same ink. Some of the images were covered with Glossy Accents.

    The two aeroplane images were heat embossed, using a VersaMarker watermark pen & clear embossing powder.

    I took two of Tim Holtz’s Doo-Dad words from his distressables range. On the travel word I set a brass eyelet & added hessian threads.

    The tag & wings are grungeboard elements from Tim’s idea-ology range. I coated them in a mixture of acrylic paint (Hazelnut) & Crackle Accents. Once dry, I sanded the edges & rubbed Distress Ink (walnut stain) over the top. The tag was attached to the base using hessian threads so it hangs free.

    The two photo corners were added & coated in Glossy Accents.

    13 May 2008

    Beauty

    The challenge set for us this week on Inchy by Inch is Faces & on My Time to Craft the theme is Dark Hair.


    The base is from the Shabby Princess Moody Blues range printed onto cardstock from Bazzill Basics. A smaller square of the plain white Bazzill cardstock was mounted in the middle.

    The face is from a Crafty Individuals stamp, stamped onto glossy photographic paper with Archival Ink (Sepia). She was stamped again onto the blue cardstock & just the ribbon cut out. The face was mounted using 3d foam pads.

    The word is a Doo-Dad from Tim Holtz’s distressables range.

    Finally I used a white opaque pen by Inkssentials, to add detail to the corners.

    12 May 2008

    Discover

    The inchie challenge theme this week on the Small World of Inchies blog* is Wings.


    The inchie base was printed from a download available from Crafts Beautiful. I added torn strips of word definition paper by K&Company, which had been aged with Distress Ink (antique linen).

    From the same download, I cut the circle element & used 3d foam to mount it onto the inchie. The bird image, a clear stamp by Anna Griffin, was stamped with black ink onto another piece of card printed from a Crafts Beautiful download. The branch was coloured with Distress Ink (walnut stain) & a word Doo-Dad from Tim Holtz’s distressables range was added.

    The inchie was edged in Distress Ink (antique linen).


    * This challenge blog is no longer in existence.

    11 May 2008

    Birthday Girl

    This was a birthday card made for a friend's young daughter. Her mother tells me that Katieann like her card so much, she even took it to school to show her friends.


    I used paper & elements from the Shabby Princess Sweet Sprinkles range.

    The letters spelling out her name were decoupaged with 3d foam & a clear circle bubble was added onto the printed pink brad.

    Simple, but I guess successful.

    Thanks to Katieann's mother for the photo xx

    10 May 2008

    Mothers

    The challenge this week on Make a Moo or Two is
    Mothers.


    I typed up words which described the wonderful attributes of my Mother
    & printed this onto paper from the Shabby Princess Shabby Mommy range.

    I then dry brushed acrylic paint over the top to soften the background.

    I used an emery board to distress the edges to remove some of the print & paint.

    I tore a couple of strips of the paper
    & aged them with Distress Ink (antique linen)
    & added them to each moo.

    I used a small Sugarloaf Morsel stamp
    from their Vintage Collection
    to stamp over the background, using Distress Ink (walnut stain).

    The moos were edged with Distress Ink (walnut stain).

    I cut out four flowers, using a Woodware paper punch.
    They were edged with Distress Ink (walnut stain)
    & using the same ink,
    I stamped another Morsel image in the middle of each flower.

    I shaped them with a dry embossing tool & put gold Stickles in the centres.

    The images are from photographs of my Great-Grandmothers.

    They were edged in Distress Ink (walnut stain) &
    then the image outline faded using a eraser.

    I love working with old family photographs
    & really enjoyed making these.

    Great theme.

    09 May 2008

    Wishing you a very Happy Birthday

    The new challenge on Layers of Color is to use embossing & the challenge on Arty Girls this week is 3d, so I have combined these two challenges for this greetings card.

    As it is my Father’s birthday next week, I wanted to make him a very special card. So this is for him, made with much love. I hope he has a wonderful day.


    The papers used are by K&Company (Verbena Gold Daisy/Peabody Green & Brown Patterned) & the stamps by Anna Griffin.

    I stamped the frame image onto the Peabody paper using clear Versamark ink & heat embossed with gold powder. I cut an x shape into the middle of the frame & folded the edges under. I trimmed the excess paper away before sticking the edges down.

    I stamped the butterfly image onto a piece of green textured card, using clear Versamark ink. I then heat embossed with gold powder. I then stamped the butterfly onto the Verbena paper, twice, heat embossed & cut around the images. The two butterflies were shaped using a dry embossing tool & layered onto the base butterfly image, using silicone glue. I added a couple of gold peel offs as accents.

    I punched four flower shapes using a Woodware paper punch. They were shaped using a dry embossing tool & adhered to the edge of the frame using silicone glue.

    The text stamp was stamped onto a piece of green textured card & heat embossed. It was edged with a Krylon 18ct gold leafing pen. It was mounted with 3d foam over green organza ribbon.

    08 May 2008

    Diva

    Wednesday Stamper set a challenge this week to bring out the Diva in us, Scrummy Stash Café challenged us to make something with an unusual shape & My Time to Craft asked us to use ribbons, so I have combined the three together to create an altered jigsaw piece.

    Being a Diva of course, I always do as I want, so I can combine all three challenges & no-one will dare challenge me about it.


    The base was painted & left to dry. It was stamped using a Non-Sequitur stamp with clear Versamark & heat embossed with gold powder, to create the background.

    The image is from a copyright-free graphics cd from Crafty Computer Paper. Glossy Accents was added to the ribbon in her hair & the butterfly.

    I printed off the wording & added a strip of vellum. I set an eyelet in the top & added the ribbons. Finally it was edged with a Krylon 18ct gold leafing pen.

    07 May 2008

    Just to say ...

    The theme on the Funky Fairy Challenge blog this week is Going Dotty.


    I made a greetings card using papers which were all free downloads from the Funky Fairy Inspirations blog.
    I added organza ribbon, a black brad & the butterfly image (Anna Griffin clear stamp).

    06 May 2008

    Dream

    The inchie challenge on Inchy by Inch this week is to make an inchie based on the first letter of your name, so mine is D.


    The base is paper from the Shabby Princess Celebrating range. It was edged with Distress Ink (fired brick). I added the Dream word from one of Tim's Doo-dad sheets, edged in Distress Ink (mustard seed).

    To make the Daisy flower, I printed off my own Dream Definition wording & cut out the shape using a paper punch. I added a yellow centre (punch from the same Doo-dad sheet) & cut a green stem.

    The butterfly was edged in Distress Ink (fired brick) & I added a few Dots using my Inkssentials opaque pen. To complete the inchie, I added a few more Dots to the two of the corners & made a corner tab from vellum.

    05 May 2008

    Vintage Collage

    The inchie challenge theme on the Small World of Inchies blog* this week is Vintage.


    The white card base was coloured with Distress Ink (walnut stain). This was covered in a piece of linen, which had been coloured with distress ink & left to dry. The edges were then frayed.

    I added a strip of tape measure showing imperial measurements.

    I cut out an image of a vintage car. I added two old watch screws for the hubcaps & applied gunmetal metallic rub-on.

    I took a piece of lace patterned vellum & aged it by tearing the edges & using walnut stain ink. I added a cog from an old watch & the word doo-dad from Tim Holtz distressables range.

    I then sprayed over the inchie using a mini mister spray containing a blend of walnut stain ink & water.

    * This challenge blog is no longer in existence.

    04 May 2008

    Songbird

    The new theme for Leonie's Fab Friday Artist Trading Card Challenge is Music from the Heart.

    I was inspired to make my ATC by the joyous sound of the dawn chorus.


    The mountboard base was covered in paper from Crafts Beautiful. It was edged with a Krylon 18ct gold leafing pen.

    To make the heart, I used a Fiskars template & paper from the Urban Couture range (URB-362 Damask) by Basic Grey. The edge was inked with black ink. I wound gold metallic thread around one half.

    To make the stand, I folded over the bottom of the heart & covered it with another piece of paper. I love the way it can stand up by itself.

    To make the bird, I first had to make a silhouette template. Then I placed it over some sheet music, drew around the template & cut it out. From the sheet music, I also punch a small heart shape. It was mounted onto card & edged with black ink. I wound gold metallic thread around it & mounted it onto the larger heart using 3D foam pads.

    I cut freehand from the sheet music to make a branch to place under the bird's feet.

    I secured a photo anchor with a brad, which would form the closure mechanism.

    I printed off my chosen words onto plain white paper, then coloured the paper with Distress Inks (antique linen) before cutting out each word.


    To listen to the birds singing first thing in the morning, so full of joy & excitement at the new day, really does warm my spirit & cheer my soul.

    03 May 2008

    True Friend

    The challenge on Layers of Color this week is to make a skinny on the theme of Friendship.

    I started by writing a poem about my friend, which reads:-
      Though you are always busy
      As daughter, mother, wife
      You don’t hesitate a moment
      To be a friend in my life

      You always have the time
      To listen to my woes
      To share in my laughter
      Stand up against my foes

      Though distance separates us
      Though we live miles apart
      As a true friend & companion
      You’re always here in my heart
    The mountboard base was coloured with Distress Inks (tattered rose & aged mahogany). I used a script & corner stamp by Crafty Individuals & a cherry blossom miniature stamp from Claritystamp with the same inks to complete the background.

    The poem was printed onto a sheet of Hannah paper from the K-ology range by K&Company.

    The girl stamp, also by Crafty Individuals, was stamped with Distress Ink (walnut stain) onto cream card, cut out & coloured with Distress Inks (mustard seed, tattered rose & antique linen). The image was stamped again onto Hannah patterned paper & just the flower cut out. This was shaped & layered onto the image.

    I made the larger flowers by using a small woodware flower punch & shaping them with an embossing tool. Gold Stickles was added to the centres of the flowers.

    I covered the corner images with Glossy Accents. Finally, the skinny was edged with Distress Ink (aged mahogany).

    02 May 2008

    The Gold is Mine

    The challenge on Make & Moo or Two this week is
    Gold.


    The mountboard base was coloured with Distress Ink (spiced marmalade)
    & edged with a Krylon 18ct gold leafing pen.

    The image is from art-e-zine.

    01 May 2008

    Storage Solution

    I need storage for all the Artist Trading Cards
    that I have made recently, so I made a box to keep them in.


    I cut six pieces of mountboard & covered all the sides with paint.

    Once this had dried, I made the holes with my Bind-it-All machine by Zutter.

    I then embellished them with stamped images by
    Ann Griffin (backgrounds & butterfly)
    Crafty Individuals (large heart)
    elusive images (art)
    Tim Holtz (girls)

    I used Distress Inks
    (broken china, weathered wood & fired brick)
    & a blue pigment ink pad (origin unknown).

    I coloured the Grungeboard lettering
    with the same inks together with Adirondack’s Acrylic Paint
    (cranberry).

    The Grungeboard shapes on the lid were coloured with gold pigment ink.


    I used two heart stamps by Magenta
    & stamped onto pale blue patterned card
    (a download from Funky Fairy)
    with Distress Ink (fired brick).

    I cut out the shapes
    & used a Woodware funky heart punch.
    These were added to the mountboard.

    I used a white opaque pen by Inkssentials
    to add further detail to the stamped images.


    The lid was edged with a Krylon 18ct gold leafing pen.

    The box was assembled by tying ribbon through the holes.
    The ribbon is from a Lisa Bearnson kit & from Joanna Sheen.


    Now my ATCs have their own beautiful home to live in
    & I will have inspiration every time I look at it.