Search this blog

31 December 2007

Review of the Year

Whilst the highlight of 2006 was receiving a Thank You letter from
Buckingham Palace, for the Birthday card I made Her Majesty the Queen,
the highlight of this year was meeting Tim Holtz and
watching him demonstrating his wonderful techniques for a few hours.
Very inspiring.


The low point was the loss of two friends from the crafting world.
The wonderful thing about who we all are and what we love to do,
apart from our memories, is that I have keepsakes from them both,
which will always hold a special place in my heart.


A few of my favourite things
As I am sure with most people, my favourites creations and techniques are those that have just been made or used. So for this review I have looked back over the whole year and tried to select a few of my favourite things.
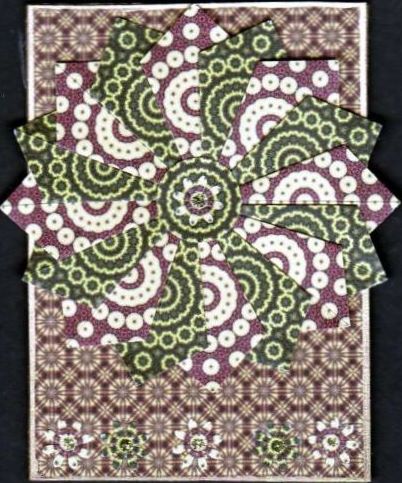
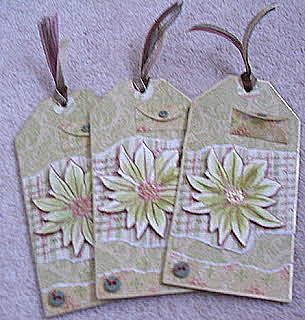

Greeting Cards
A few of my favourite cards from this year.


Artist Trading Cards
These are 2½ by 3½ inches, either portrait or landscape. Those are the only rules. I have been making these for a couple of years now, although I have not made that many this year. These are my favourites.


Fat Book Pages
These are 4 inch by 4 inch square. Usually made from thick card or mountboard. They are decorated front and back. As you punch two holes down the left-hand side to make them into a book, this side should be left free from embellishments.


Inchies
These are 1 inch by 1 inch square. The basic rules are that each one must have an image and at least one word on it. Thereafter, there are no rules. I have loved making these this year. The size makes it a real challenge. Here are a few of my favourites.


Altered Art
There have been books made from old CD and cardboard drinks coasters, metal tin altered with alcohol inks, slide mailers and dominoes altered, but my favourites have been books made from leatherboard drinks coasters and a small chest made from match boxes.


What does 2008 hold?
I am determined to have a go at Scrapbooking.

To keep trying new techniques.

To continue to enjoy making my little works of art.

29 December 2007

Gratitude

The challenge theme was "Gratitude" and I had to think long and hard about how to make this Artist Trading Card.


The base of the ATC is mountboard, covered in paper from Scissor Sisters (p-33 Sepia Script). The butterfly rubber stamp is by Elusive Images from Graphicus. I have also used Tim Holtz Distress Ink (walnut stain) and my clear stardust pen from Sakura.

17 December 2007

The Last Noel

Finally the Christmas card for my better half. I have used Vintage Ornaments/Pine paper from Basic Grey's Fruitcake range.


Wooden letters are also covered in the paper, distressed and edge with my Krylon 18ct gold leafing pen. A small length of green organza ribbon is tied through the letter O.

The only other item used is my clear glitter Sakura Gelly Roll pen to highlight the snowflakes, ornaments and stars on the letters.

14 December 2007

Christmas Message

The challenge was to make an Artist Trading Card with a Christmas Message but to have a secret message in it.


Here is the result and only a few close friends will find the message.

The base is mountboard covered with Basic Grey paper. The poem was composed and printed onto vellum.

A brad, some ribbon and edged with my gold leafing pen.

Merry Christmas

This is a set of leatherboard drink coasters made into a Christmas themed book.

The bottoms of the coasters were covered in Snowed In/Wintermint FRU-597 paper from Basic Grey’s Fruitcake range. I used my Crop-a-Dile to punch through four holes so that they could be tied together later with ribbons and fibres. I went round the edges with Tim Holtz Distress Ink (walnut stain).


I made two pockets on the middle pages to hold the tags. The two tags were cut from white card, covered front and back with the Basic Grey paper. I used a variety of stamps from Simple Expressions and Clever Cut.

A secret message is hidden on the last page.

The tops of the coasters were left as they were as they form the back of the pages.


Embellishments are ribbons and fibres, blue adhesive stones and my Clear glitter Sakura Gelly Roll pen.

13 December 2007

Purple Christmas Take Two

Yes I known they look familiar, but I really liked the purple card, so I have made a batch for my crafting friends.


Additions to these cards are silver mirror card and silver peel offs. And look, no ribbon was harmed in the making of them.


Hope my dear friends like their cards. They have been a great source of inspiration and support this year, so "Thank you" from the very depths of my heart.

10 December 2007

Little Daisy blue, didn't know what to do ...

The challenge was to make an Artist Trading Card on the theme of Nursery Rhymes, but no craft items were allowed. Only scissors and adhesive.

I decided to make a small Nursery Rhyme Book. When closed it is the same dimension as an ATC, 2½ by 3½ inches. There are fifteen well known Nursery Rhymes inside, together with illustrations.


My thanks to Clip Art and Land of Nursery Rhymes

Golden Wedding


The base is the word definition paper from Life's Journey Pansy collection by K & Company. I have drawn a black line around the Celebrate section and around the whole page.

This matches the black line around the image, which is from the Crafty Individuals Miniatures "People & Place" paper pad. The image is mounted onto gold mirror card.

The 50 embellishments are wooden numbers and have been covered in yellow paper and distressed. Additional words have been added from the base paper and a small piece of ribbon tied around the 0. The edges are finished using the 18ct Gold Krylon Leafing Pen.

Four heart shapes have been punched from gold and yellow paper. Finally gold organza ribbon is tied around the spine and tied in a bow.

07 December 2007

Fly, Fly, Fly Away

Another Artist Trading Card, but using quilling, a technique that I have used only a few times before.


The base is mountboard, covered with patterned paper designed by Vanessa Arbuthnott for The English Paper Company.

One corner is covered with white mulberrry paper. The remaining sides edged with Tim Holtz Distress Ink (dusty concord).

The quilled shapes are added, together with silver wire for the butterflies antenna. A small dragonfly charm is added, attached by white organza ribbon secured through a purple eyelet on the back.

30 November 2007

And now for something different

I have tried a new technique today, tea bag folding. This is using small squares of pattern paper, folded and then made into a pattern. I have made this into an Artist Trading Card (ATC).

ATCs are 2½ by 3½ inches and usually traded for another ATC with a fellow crafter.


I have used papers downloaded from Circle of Crafters and followed their simple steps to make my first item using this technique.

The base of the ATC is mountboard and I have also used my Krylon 18kt Gold Leafing Pen, a small flower punch, a circle punch and Gold Stickles.

26 November 2007

Variation on a theme


The Poinsettia rubber stamp (by Magenta) was stamped onto textured white card with Archival Ink (Jet Black). The image was then stamped again onto Hannah paper from K-Ology range by K&Company. Each leaf was cut out and shaped and adhered to the image on the white card using silicone glue.

A clear glitter Sakura Gelly Roll pen was used to highlight the stamped image, together with a red glitter pen for the centre of the poinsettia.

This was then mounted onto red paper. I have used four metallic red eyelets from Dovecraft’s Christmas set, to embellish the corners of the image.

I have used the Christmas word stamp, from Simple Expressions, stamped along the bottom edge with ColorBox pigment ink (Gold). The letters were then highlighted with the clear glitter pen.

This was then used as a topper onto another piece of green textured card and a strip of Hannah paper, edged with red organza ribbon.

24 November 2007

It's cold out there

One of my friends loves snowmen, so this card is especially for her.


Using a Snowman stamp from Simple Expressions, I have stamped the image onto white pearl card and embossed with clear embossing powder. This gives the snowman a wet, icy feel. I have used ivory Flower Soft and crystal ultra fine transparent glitter on the hat.

The image is then layered onto pale and dark blue card and finally on glitter card.

The card is finished with a strip of doodlebug accent satin ribbon (whimsical winter).

22 November 2007

Dreaming of a Purple Christmas

My third Christmas card design has a familiar feel, but the colour choice is for a friend who loves purples.


The Tree rubber stamp from Magenta is stamped on textured white card with Archival Ink (Jet Black). It is then stamped again onto patterned paper designed by Vanessa Arbuthnott for The English Paper Company.

As on the Black and White card, the various trees and bases are cut out, shaped and secured with silicone glue.

Clear glitter Sakura Gelly Roll pen is used to highlight the trees and stars, with silver Stickles to embellish the corners. It is edged with a Krylon Silver Leafing Pen.

The Merry Christmas stamp from Simple Expressions is stamped with Tim Holtz Distress Ink (dusty concord).

This is mounted onto white mulberry paper and then onto Tim Holtz distressables cardstock (0740 Games).

The card is finished with white organza ribbon, tied around the spine.

19 November 2007

Dreaming of a (Black &) White Christmas

This card has received a mixed response.


The Tree rubber stamp is by Magenta. It was stamped onto textured white card with Archival Ink (Jet Black). Then the image is stamped onto Beetle Black Sweet Stripes (035) and basically black asterisks (1077) from doodlebug design inc.

Each alternate tree and base is then cut out and shaped and adhered to the image on the white card using silicone glue. A clear glitter Sakura Gelly Roll pen is then used to accent the trees and corners.

This is then mounted onto Tim Holtz distressables cardstock (time 0733) and glitter card.

I have used the Christmas word stamp, from Simple Expressions, along the bottom edge with ColorBox pigment ink (Frost White). Once dry, the letters are highlighted with the clear glitter pen.

This is then used as a topper onto another piece of the distressables cardstock and a strip of doodlebug paper.

Finished with white organza ribbon. I have again cut a ½ inch away from the opening edge of the card.

14 November 2007

Christmas Card

The time has finally arrived for me to start making my Christmas Cards.


The Poinsettia rubber stamp is by Magenta. It was stamped onto textured white card with Archival Ink (Sepia). Then the image is stamped onto Hannah paper from K-Ology range by K&Company. Each leaf is then cut out and shaped and adhered to the image on the white card using silicone glue. Gold Stickles is then used for the middle of the poinsettia and on the four corners.

This is then mounted onto textured green and burgundy card. I have used the Christmas word stamp, from Simple Expressions, along the bottom edge with Tim Holtz Distress Ink (aged mahogany).

This is then used as a topper onto another piece of green textured card and a strip of Hannah paper. Finished with burgundy organza ribbon.

I have cut a ½ inch away from the opening edge of the card to add a twist.

I don't know why, but the burgundy card has scanned as purple. Trust me, it is most definitely not.

More Christmas Tags

I have made a few more Christmas Tags for the same swap as before, but this time used a different design. The tags are 6 inch by 3 inch and made from mount board.


Basic Grey is one of my favourite paper design companies. I have used Snowed In / Wintermint FRU-597 from their Fruitcake range.

I have covered the front of the tags with the Snowed In side. I then stamped the snowman rubber stamp from Simple Expressions with Archival Ink (Sepia) on a piece of the Wintermint side.

I have used the Christmas word stamp, again from Simple Expressions, along the bottom edge.


A small brown button is added, along with a new craft item for me, Flower Soft.


The backs were covered with the Wintermint side of the Basic Grey paper.

A small envelope, containing the details of the swap (printed on Hannah paper) is added along with snowflakes punched from Hannah paper, together with a small strip of the same paper across the bottom.


The whole tag is then edged with my Krylon 18kt Gold Leafing pen.

The final touch is three colours of organza ribbon tied through the top of the tag.

08 November 2007

Christmas Tags

These are my Christmas Tags.
It is for a swap with my crafty friends.
The tags are 6 inch by 3 inch and made from mount board.


I have covered the fronts with Hannah papers from the K-Ology range by K&Company. The poinsettia rubber stamp is from Simple Expressions (from Katy's Corner). Stamped with Archival Ink (Sepia), once onto watercolour paper and then again onto Hannah paper.

The watercoloured one is then coloured with, yes, watercolour pencils and then Tim Holtz Distress Inks (aged mahogany & peeled paint). The poinsettia is then cut away from the background words and edged with the aged mahogany ink.

The centre of the poinsettia is then dabbed with my Sailor 2 in 1 Glue Pen and when dried, fine gold glitter is rubbed over the dried yet tacky glue. I used small 3D foam pads and you will have to forgive me here, I colour the edges of each pad with the aged mahogany ink to dull down the whiteness of the foam pads. There I've said it. It is then mounted over the other stamped image.

The other embellishments are a small envelope, containing the details of the swap (printed on Hannah paper) and two buttons.


The backs were inked with Tim Holtz Distress Ink (peeled paint) and stamped with the Christmas word stamp, again from Simple Expressions
One side of the letters were edged with glue and glittered, as before.


A small strip of torn paper across the bottom completes the back.

The whole tag is then edged with my Krylon 18kt Gold Leafing pen. The final touch is three colours of organza ribbon tied through the top of the tag.

Christmas Fat Pages

These are Fat Pages made for a swap with my crafty friends.

Fat pages are 4 inch by 4 inch square,
decorated front & back & usually on a theme.

This theme was Christmas.

After the swap, I will end up with a collection of pages from everyone,
which I will then make into a book, using book rings.

It will be a wonderful source of inspiration from a very talented group of friends.


The overall colour scheme was blue & brown. I used mount board as the base.

The fronts were covered in good quality cardstock s.e.i Grannys Kitchen (apron/table ticking 7-7110 & tablecloth/kitchen stripes 7-7104) & Tim Holtz distressables (Postale 0737).

I stamped the tree stamp from Magenta’s Snow Much Fun set onto watercolour paper using Adirondack’s Denim Dye Ink Pad & with my water brush bled the ink inwards on each tree & outward from the border.

Using my craft knife, I cut four slits on each side of the border & fed organza ribbon through, to adhere it to the back.

Using my Sakura clear Gelly Roll glaze pen, I went over the stars & corners. I added a star shaped crystal to the top of one of the trees.

Using my water brush, I torn some white mulberry paper slightly larger than the watercolour paper & mounted my stamped imaged on top.

Using my crop-a-dile, I made a hole in the top right corner & secured a large blue eyelet.

I edged the mount board with my Krylon 18kt Gold Leafing pen before adding two colours of organza ribbon & threading them through the eyelet.


The backs were inked with Tim Holtz Distress Inks (Antique Linen & Weathered Wood), spritzed with water using a Mini Mister, then sprayed with the Moon Glow’s Moon Shadow Mists (Buccaneer Bay Blue & Buccaneer Bronze) & dried with a heat gun.

I made a small 1 inch pocket for the back to hold a small tag using paper from Lasting Impressions Sea Shore Collection  (Sea Spray SES5).

Using my piercing tool, I made small holes around the edge of each pocket & stitched through the holes with white cotton thread using a sewing needle.

I cut out a square of the paper & mounted the pocket to it. I then attached this to the front of some mulberry paper, as described previously.

I printed out text from the computer to make the tags; a greeting on the front & a hidden message on the back. Using my Krylon 18kt Gold Leafing pen, I edged both front & back then stuck them back to back, enclosing a small organza ribbon loop between the two sides.

Using a small snowflake punch, I cut out a snowflake from the pocket paper & stuck it to the centre of each pocket, placing a small round crystal in the centre.

Welcome ...

... to my blog.

Many of my crafting friends have started blogs as a way to show their work.

I hope that mine will inspire them as much as theirs inspire me.